miércoles, 23 de septiembre de 2009

Create Charts in Excel 2007 the Easy Way with Chart Advisor

Create Charts in Excel 2007 the Easy Way with Chart Advisor: "

Creating charts in Excel spreadsheets is a great way to represent data in a visually appealing way, but can be too time consuming finding the appropriate one. Today we take a look at Chart Advisor from Microsoft Office Labs which makes the process more efficient.


Note: Remember this is a prototype and under development and may not work perfectly with your system. 


Install Chart Advisor 


Because this is an Office Labs prototype you will need to participate in Usage Metrics and Auto Update. Continue through the installation wizard to complete the process.


1-ca 


After the installation is complete open Excel and you will see it under the Insert tab in the ribbon.


2-ca


Using Chart Advisor


Here we will take a look at using Chart Advisor. Open up an Excel spreadsheet and select the data you want to to create a chart on. In this example we’re using monthly sales figures for tools and supplies. After you have highlighted the cells click on Chart Advisor under the Insert tab.


4-ca


Give it an moment while Chart Advisor analyzes the data and recommends appropriate charts.


1-1ca 


Hover over the different suggestions at the top to get a more detailed view of how it will look.


7-ca


The amount of charts you have to choose from will be determined by the data cells you select. Also notice they are sorted by relevance.


3-ca


Just hover the pointer over the percentage box on each suggestion to get a detailed formula of why it got its score.


5-ca


You can filter data to further modify the charts.


6-ca


You can further tweak the chart under Modify Chart and change data positions, exclude data, etc.


8-ca


When done configuring the chart just click the Insert Chart button to place it into the spreadsheet.


9-ca 


If you are looking for a way to speed up how you create charts and graphs in your Excel presentations then you might want to check out this add-on.


Download Chart Advisor from Office Labs


Tomado de: howtogeek.com
sábado, 19 de septiembre de 2009

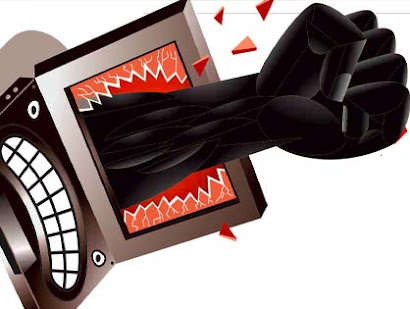
La historia del hacking en una imagen

La historia del hacking en una imagen: "

Y para sorpresa de muchos no aparecen imágenes de Operación Swordfish. La acabo de ver en Daboblog y la fuente original es Focus.com. Ojo para los puristas porque se mezcla hacking puro con crackers así que después de echarle un ojo nada mejor que complentar la clase de cibercultura con el ya mítico artículo de Microsiervos de Diferencias entre hacker y cracker.


hack


"

ToYcon: convertir imágenes a iconos

ToYcon: convertir imágenes a iconos: "

Ya hemos hablado por aquí de cómo crear iconos para Windows con IconArt y de cómo cambiar los iconos en Mac OS X. Hoy os traigo una aplicación hipersencilla para transformar imágenes en .jpg, .png y otros a iconos (extensión .ico) para usarlos donde queráis.


La aplicación se llama ToYCon:
Descargar ToyCon

Primero tenemos que descomprimir el archivo que nos hemos descargado y luego buscar dentro de la carpeta el archivo ToyCon.exe


screenshot007


Al abrirlo aparecerá una pequeña caja en nuestro escritorio. Lo único que tenemos que hacer es hacer click en la imagen que queramos transformar a icono y sin soltar arrastrarla a la caja. Automáticamente se creará el icono:


screenshot0081


Hipersencillo y sobre todo: seguro. Es increíble la cantidad de porquería que se encuentra en internet relacionada con el mundo de los iconos.


"

Como borrar un virus y no morir en el intento

Como borrar un virus y no morir en el intento: "
Esta es sin duda de las preguntas más comunes que un informático puede recibir. ¿Puedes borrar los virus de mi PC? No existe nada complicado en hacerlo, pero por increíble que parezca, ¡no saben como hacerlo!. Mucho menos si el virus es realmente de aquellos que se resisten a morir. Acá una pequeña guía, para los no informáticos, de lo que se debe y no debe hacerse para limpiar una PC de manera adecuada y así no tener que llamar a un informático para que nos resuelva el problema (y de paso te ahorras un dinero)

1.- ¿De que estoy infectado, un virus o un Spyware? El común de los usuarios no puede distinguir entre ambos. Por esta razón en muchas ocasiones los antivirus no pueden detectar el bendito progama que nos abre ventanas por doquier, porque sencillamente este no es un virus, sino un spyware. Si buscamos la definición de Spyware veremos que este tipo de programas se encargan de capturar información acerca de nuestros hábitos en internet, direcciones visitadas, etc. Por eso considero básico no solo pasar un buen antivirus, sino además un buen anti-Spyware. Un buen Antispyware, y gratuito encima, es el Ad-Aware en su versión free. Puedes descargarlo desde :

http://download.cnet.com/Ad-Aware-Anniversary-Edition/3000-8022_4-10045910.html?part=dl-ad-aware&subj=dl&tag=top5


2.- ¿Basta pasar el antivirus o el AntiSpyware? No, no basta. Antes deberíamos tomar otras acciones previas antes de pasar estos programas. Como primer paso debemos revisar que esta corriendo en la memoria de nuestra PC. Existen muchas formas de ver esto. La más típica es presionando Ctrl+Alt+Spr y escogiendo 'Administrador de tareas'. Ahí podemos ver que programas están corriendo en la PC. Pero no es nada cómodo y preciso. Recomiendo usar el Process Explorer. Puedes bajarlo desde acá :

http://download.sysinternals.com/Files/ProcessExplorer.zip


Esta sencilla aplicación pero muy útil te permite visualizar de manera rápida lo que está corriendo en tu PC.

Como último paso previo a pasar el antivirus o antispyware, debemos desactivar la opción llamada 'Restaurar Sistema'. Cuando esta opción está activada, guarda los archivos del sistema y drivers de nuestra PC, como si de un backup se tratara. Pero ¿que pasa si nuestros archivos del sistema están infectados? Por eso necesitamos desabilitar esta opción para los virus no puedan 'ocultarse' en los backups creados por la opción 'Restaurar Sistema'. Para deshabilitarlo debes ir al Panel de Control, busca la opción Sistema y marca la ficha 'Restaurar Sistema'. Busca el check 'Desactivar resturar sistema en todas las unidades' y marcalo. Solo después de esto puedes pasar un antivirus o antispyware.


3.- Limpia tu USB No tienen ni idea cuantos trabajos bien realizados se van al tacho porque solo se contemplo una fuente de peligro (la PC infectada) pero no otras posibles fuentes (por ejemplo, un USB). Caso típico, una PC es completamente desinfectada, pero apenas el usuario coloca su USB, ¡la infección vuelve! Resultado : Horas de trabajo perdido, molestias y desconfianza con el informático que realizó el trabajo.


4.- ¿Conoces a tu enemigo? Algunas virus se ponen 'tercos' y son difíciles de eliminar. Por más que uno da todos los pasos previos mencionados en este post, el miserable no muere. Si consigues el nombre del virus (el antivirus debería darte el nombre) nunca está demás buscar en internet información acerca de este. Quizá exista una solución específica para eliminarlo o alguna herramienta en concreto que solucione el problema.


5.- ¿Que antivirus me recomiendas?
Pregunta difícil. Quizá deberías hacerte un par de preguntas previamente. La primera, ¿Es mi PC lo suficientemente fuerte? ¿Tiene la suficiente memoria? La segunda pregunta sería ¿Estoy dispuesto a pagar por un antivirus?

Yo por lo general solo recomiendo los siguientes :

- AVG Free : Buen antivirus, incluso en su versión free, lo uso hace ya muchos años en 'n' computadores. Recomendable en PC's con poca potencia y si no estas dispuesto a pagar por un antivirus.

- Kaspersky : Otro buen antivirus, pero es de pago y es un poco 'pesado' para la PC, es decir, consume bastante memoria de la máquina. Reco
mendable si tienes un 'maquinón' y estas dispuesto a pagar.

- NOD32 : Muy buen antivirus. Corre en máquinas con poca potencia. Vale cada centavo que pagues. Elije el que más te convenga.

Mi recomendación : AVG, gratuito, liviano y eficiente. Puedes descargarlo desde acá :

http://download.cnet.com/AVG-Anti-Virus-Free-Edition/3000-2239_4-10320142.html?part=dl-10044820&subj=dl&tag=button&cdlPid=11014801

O desde :

http://free.avg.com/

6.- La solución final ¿Que pasa si has intentado todo y a pesar de todo el virus sigue vivo? Contempla la opción de formatear el equipo. En mi experiencia personal, a veces es mejor rendirse y formatear el equipo, acción que puede llevar un día entero, a perder dos días tratando de reparar los problemos ocasionados por el virus.


Escrito por:

Alberto Peves M

"

Ingeniería de software (eBook en español)

Ingeniería de software (eBook en español): "
1. Software e ingeniería del software. Parte 1. El proceso del software.
2.El proceso: una visión general.
3. Modelos prescriptivos de proceso.
4. Desarrollo ágil. Parte 2. Práctica de la ingeniería del software.
5. La práctica: una visión genérica.
6. Ingeniería de sistemas.
7. Ingeniería de requisitos.
8. Modelado del análisis.
9. Ingeniería del diseño.
10. Diseño arquitectónico.
11. Diseño al nivel de componentes.
12. Diseño de la interfaz de usuario.
13. Estrategias de prueba del software.
14. Técnicas de prueba del software.
15. Métricas del producto para el software. Parte 3. Aplicación de la ingeniería Web.
16. Ingeniería Web.
17. Formulación y planeación para ingeniería Web.
18. Modelado de análisis para aplicaciones Web.
19. Modelado de diseño para aplicaciones Web.
20. Cómo probar aplicaciones Web. Parte 4. Gestión de proyectos de software.
21. Conceptos de gestión de proyectos.
22. Métricas de proceso y proyecto.
23. Estimación para proyectos de software.
24. Calendarización de proyectos de software.
25. Gestión del riesgo.
26. Gestión de la calidad.
27. Gestión del cambio. Parte 5. Temas avanzados en ingeniería del software.
28. Métodos formales.
29. Ingeniería del software de sala limpia.
30. Ingeniería del software basada en componentes.
31. Reingeniería.
32. El camino por recorrer.

Aquí:
http://w15.easy-share.com/1702596388.html
http://w17.easy-share.com/1702596381.html
http://w17.easy-share.com/1702596382.html
http://w17.easy-share.com/1702596395.html

o aquí:
http://www.megaupload.com/?d=LPOXYSNW
http://www.megaupload.com/?d=CDEQ32XI
http://www.megaupload.com/?d=3HUGAWUF
http://www.megaupload.com/?d=WB1S9O9I

Alberto Peves M.
"

Evita que se ejecuten tareas básicas en Windows con Prevent

Evita que se ejecuten tareas básicas en Windows con Prevent: "

Evita que se ejecuten tareas básicas en Windows con PreventSi compartimos el ordenador con otras personas y no queremos que estas se pasen de la ralla siempre hay alguna forma de tenerlo enfilados. Quizás una forma para ello sea prohibirle que ejecute tareas básicas como cortar y pegar y otras más. Para ello podremos recurrir a Prevent.


Prevent es una pequeña herramienta que instalada en nuestro sistema evitará que se ejecuten ciertas tareas, como son: cortar, pegar, copiar, eliminar, copiar a, mover a, enviar a, renombrar y cerrar procesos. ¿Exagerado? Bueno, depende de para que lo usemos.


Y es que Prevent es más potente de lo que parece. Lo primero que se le viene a uno a la cabeza cuando ve una herramienta así es “Bueno, pues cierro el proceso y adiós prohibiciones”. Pues no, porque la herramienta permanece invisible para el usuario y aunque quiera y sepa no podrá matar el proceso ya que el botón para ello estará deshabilitado.


Ya digo que quizás para la mayoría de nosotros esta herramienta no tenga ninguna utilidad, pero en ciertos entornos (ordenadores de los que se quiera evitar que se saque información, por ejemplo) puede venir de perlas. Prevent es gratuita y funciona con Windows, aunque en la web de la aplicación no se indica exactamente con cual no creo que haya problemas en abrirlo en Windows XP o Vista.


Vía | gHacks

Descarga | Prevent


miércoles, 16 de septiembre de 2009

How to remove Virus from USB Drives using command line in Windows

One of the ways by which a virus can infect your PC is through USB/Pen drives. Common viruses such as ’Ravmon’ , ‘New Folder.exe’, ‘Orkut is banned’ etc are spreading through USB drives. Most anti virus programs are unable to detect them and even if they do, in most cases they are unable to delete the file, only quarantine it. Here are the things which you can do if you want to remove such viruses from your USB drives

Whenever you plug a USB drive in your system, a window will appear similar to the one shown below

USB


Don’t click on Ok , just choose ‘Cancel’. Open the Command Prompt by typing ‘cmd‘ in the run box. In the command prompt type the drive letter: and press enter . Now type dir /w/a and press enter.

This will display a list of the files in the pen drive. Check whether the following files are there or not


* Autorun.inf
* Ravmon.exe
* New Folder.exe
* svchost.exe
* Heap41a
* or any other exe file which may be suspicious.

If any of the above files are there, then probably the USB drive is infected. In command prompt type attrib -r -a -s -h *.* and press enter. This will remove the Read Only, Archive, System and hidden file attribute from all the files. Now just delete the files using the command del filename. example del Ravmon.exe. Delete all the files that are suspicious. To be on a safer side, just scan the USB drive with an anti virus program to check whether it is free of virus or not. Now remove the drive and plug it again. In most of the cases, the real culprit turns out to be the “Autorun.inf” file which mostly gets executed when someone clicks Ok in the dialog window which appears above. Thus the infections can spread

Security Tip

Disable the Autoplay feature of USB drives. If you disable the Autoplay feature of USB drives, then there are lesser chances of the virus spreading. A tool which can perform such a function is Tweak UI. Download it from here install it.

Tweak UI

Run the program. Now you can disable the Autoplay feature of the removable drives as shown above. By following the above steps, you can keep your USB drives clean. If there are any other methods which you use, then share it with me through comments.

Taken from: WHOISMADHUR

domingo, 13 de septiembre de 2009

7 Must Read Presentations for Job Seekers

These seven presentations are handpicked by the Applicant Blog at applicant.com. They also got some love from from getthatjobonline.com

1. Effective Job Interviewing from Both Sides of the Desk
It is gives great advice by looking at both sides of the job interview. My favorite tidbit is, "Your Awesomeness is not self-evident."

2. 10 Job Search Attitudes that Will Get You More Interviews
Short, but sweet. I think attitude is often an overlooked piece in the job hunt puzzle. My favorite tidbit is, "I will search as if I don't need a job."

3. Rethink your Job Search
This reads a bit like marketing material for JobTiger, but is still has good content. My favorite tidbit is, "Tap into job openings that may not have been published."

4. Leveraging LinkedIn for the Job Search
A great little walkthrough on using LinkedIn for your job search. Favorite tidbit, "When you find a connection, leverage it to find other connections."

5. 10 Commandements of Job Search
This is the presentation by the Applicant Blog, and it stresses staying positive. "Ignore the fact that your friend, uncle, aunt and even your mother-in-law is unemployed. It's about you."

6. Job Serach with Social Media & Mobile
This is a great presentation that covers LinkedIn, Facebook, Twitter & some mobile apps. "Maxims remain the same ... tactics are very different."

7. Converging Trends Impacting Your Job Search
It covers a lot of ground discussing marketing trends, social media and what networking means today. "Become a content expert ... shift, cull & create content"

viernes, 11 de septiembre de 2009

Block Those Irritating Facebook Quiz & Application Messages

Block Those Irritating Facebook Quiz & Application Messages: "

You know how it goes… you finally signed up for Facebook after your friends and family kept bugging you, and now your Facebook Wall is just covered in idiotic quizzes, applications, and other random nonsense. You can’t block everybody, so what can you do?


Facebook is Annoying!


They forgot the stat about how many friends hate you for taking so many quizzes…


Blocking Individual Applications


If your significant other is completely addicted to some retarded Flash game on Facebook, you’ve probably ended up with a ton of messages about every tiny accomplishment in the game. The easy option is to simply click Hide –> Hide Application.


Farmville, honestly?


This sometimes works… but with the amount of nonsense on Facebook, you’ll quickly be overrun with new games on a daily basis, and you’ll have to hide every single one of them, defeating the whole purpose of reading this article.


Blocking Posts On Your Wall


If you’ve really given up, and don’t need your wall cluttered up with stuff that you didn’t put there, you can simply block anybody and everybody from posting to your wall by changing the settings… hit the Settings link while looking at your wall.


Facebook Wall Settings


Then remove the checkbox by the option for “Friends may post to my Wall”.


Disable the Wall


Your friends will still be able to message you, chat, and you can still comment on their idiotic nonsense—but they won’t be able to post anything to your wall.


Use Facebook Purity to Block Annoying Applications


If you can’t disable your Wall entirely because you want your friends to be able to post real messages there, you can always use a Greasemonkey script for the Firefox browser, which will completely disable all of those idiotic quizzes, applications, and other nonsense.


You’ll need to make sure that you first install the Greasemonkey extension and restart Firefox, if you haven’t already. Once you’ve done so, head over to the Facebook Purity installation page, click the Install button, and you’ll be prompted to install the script.


Install FB Purity


The next time you load up your Facebook Wall, you should see that the idiotic nonsense is blocked, and there’s a tiny little link in the upper right that lets you unhide the hidden stuff if you so choose.


Sweet, blocked!


It’s the type of script that is pretty much required if you want to use Facebook without losing your mind.


Download Facebook Purity Greasemonkey Script from userscripts.org

miércoles, 9 de septiembre de 2009

Burn Any Video File Type To Play on A DVD Player

Burn Any Video File Type To Play on A DVD Player: "

Instead of watching video files on your PC it be nice to have a disc to pop into any player to watch from other locations.  Today we take a look at DVD Flick…a free and Open Source DVD authoring tool used to make a playable DVD from several different video file formats.


Installing DVD Flick


Installation is a quick and easy process following the install wizard.


1nstall


After installation you will get a welcome screen that will allow you to read through their guides, website, and forums.


2 Welcome


Using DVD Flick


Here we will demonstrate making a quick DVD using three differently formatted videos.  The first thing we’ll do is add a new title or video clip(s) to the project.


3 add title


You can either browse for them in Explorer or simply drag and drop into the project window.  Notice we are using three video formats with AVI, WMV, and FLV.


NEW


Now in the project area you can start authoring the DVD by moving clips, editing titles, etc.


NewFull


There are some cool menus you can choose from to customize into the DVD creation.


DVD Menu


Once you choose a menu you can preview how it will look.


preview menu


It allows you to customize settings from basically every aspect of the DVD including Audio, Video, Burning and general settings.


Project Settings


Projects are saved with a .dfproj file extension which may look odd later if DVD Flick is not associated with them.


saved project


Click on the Burn DVD button when ready and you’ll be shown a progress screen with an extra cool bonus.


progress


Click on the “Entertain me” button while the DVD is burning and you can play a version of Tetris.


tetris


It uses ImgBurn technology to execute the DVD burning process and it pops up while the actual burning takes place.


imgburn2


When everything has finished you should see something similar to the picture below provided there were no errors.


Finished


DVD Flick is easy to use and light on system resources and includes just the right amount of features for the home DVD Author.  If you are low on cash this is a very good free alternative to a commercial application such as Nero. 


sshot-2009-08-05-[16-48-04]


Download DVD Flick 


Read the Full List of Supported Audio & Video Formats

OfficeTab, pestañas en Office por fin

OfficeTab, pestañas en Office por fin: "

OfficeTab, pestañas en Office por finDesde que las pestañas llegaron a nuestras vidas (y no me refiero a lo que tenemos en nuestros ojos) todo ha sido un poquito más fácil. No cabe duda que trabajar con pestañas es francamente productivo, yo personalmente a veces las echo de menos hasta en la vida real.


Una de esas aplicaciones en las que se echaba en falta el uso de pestañas es Microsoft Office (que no es una aplicación en si, pero si un conjunto de aplicaciones). La verdad es que es un poco incomprensible pensar en porque Office 2007 no incorporaba pestañas si ya estaban más que presentes en la mayoría de las aplicaciones, pero bueno, gracias a OfficeTab ya no tendremos que llorar más.


OfficeTab es una pequeña aplicación que añadirá pestañas a Word, Excel y Powerpoint. ¿Nada más? Si, porque en realidad no hace falta nada más. Por otro lado si solo queremos añadir pestañas a alguna de estas tres aplicaciones podremos hacerlo, no es necesario aplicarlo a todos si no queremos. Además la integración es bastante transparente para el usuario, parecerá que eso ha estado ahí siempre, que incluso venía ya con el Office.


OfficeTab funciona con Office 2003 y 2007 y es compatible con todos los Windows a partir del XP además de ser una herramienta totalmente gratuita. La aplicación está en inglés y chino aunque la web está completamente en chino.


Vía | DownloadSquad

Descarga | OfficeTab, traducido a español mediante Google Translate


"
 
Locations of visitors to this page